Dig It: 7 Steps to Compost Like SVdP's Urban Farm
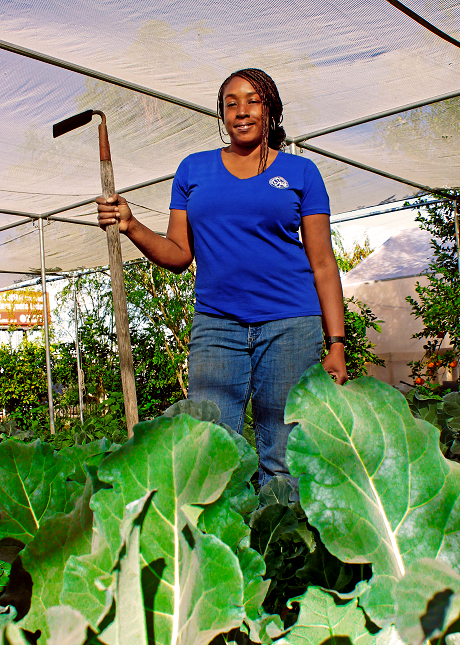
Each day St. Vincent de Paul makes a commitment to helping to community and this year that commitment is expanding by implementing sustainable practices, like composting, in our Urban Farms. Preparing for over 4,000 meals each day leads to a large amount of food waste—something that was troubling our Executive Chef Chris Hoffman and Urban Farm Coordinator Nika Forte. The programs decided to join forces to make composting a standard practice in our farms. The remains of unfinished meals, vegetables and fruits scraps, along with any expired food items are placed in bins and relocated to our farm to be composted. This added practice helps fertilize our plants, which means more healthy and nutritious food can be grown and harvested for our guests.

To celebrate this sustainable practice, SVdP is starting a social media garden series, “Dig It.” Each month, Dig It will provide helpful gardening tips from our Urban Farm staff. This month, we’re focusing on composting and how to start a pile at home.
If SVdP Can Do It, So Can You!
Does the thought of composting sound confusing?

Composting is easier than it sounds. Trust us, the whole process seems intimidating, but it’s not! Composting at home is simple and takes just seven easy steps to complete. For farmers and gardeners in Arizona, composting is especially important because Arizona soil lacks necessary nutrients like potassium, magnesium and nitrogen that plants need. “To grow a successful garden in Arizona, you must learn to build better soil, which is why composting is essential,” explains Nika. “Plants love food waste from your kitchen because they contain the nutrients our soil lacks. There is a reason compost is called “black gold” because a proper composting mixture will help build a healthier soil for the plants.” So, rather than throw away left over vegetable or fruit peelings, next time save them and combine them with grass clippings and the soil from your yard and you are ready to start composting!
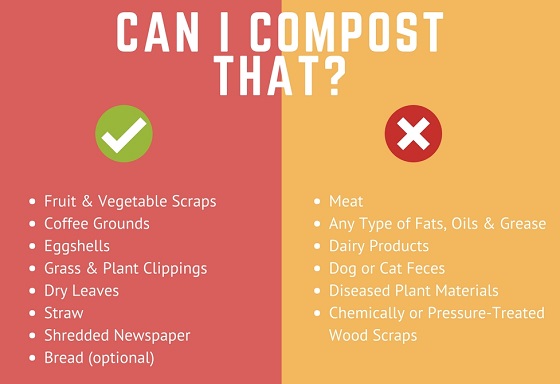
Can I Compost That?
Composting is a great way to eliminate waste and put your food purchases to good use, but you might find yourself wondering, “Can I compost that?” Before starting composting, it is important to know which items you can and cannot compost. Below are some helpful guidelines on what items are good for composting.

7 Steps to Start
Step 1: Collect Food Waste, Plant and Grass Clippings
Now that you know what you can and cannot compost, start collecting food waste from your kitchen. Keep a container in your kitchen to store your accumulated composting materials. In the meantime, save your plant and grass clippings until you have enough materials to start a pile.
Step 2: Combine Food Waste and Plant Clippings
Once you have enough materials, it is time to assemble them together! In a designated space, combine the food waste, plant and grass clipping into a pile. Depending on the space available, it is recommended that you have enough materials to make a pile that is at least three feet deep.
Step 3: Mix It All Together
It is important to have layers of organic material in your compost pile. So, mixing or “turning” your compost is a good way to make sure that all the materials are evenly distributed throughout the pile. Turning helps provide oxygen to the pile, which allows the compost heap to heat up and “cook” faster and prevents rot from forming.
Step 4: Water, Water, Water
Water is a key ingredient is successful composting. The pile needs to be wet, but not soaked –aim for the consistency of a damp sponge. Adding too much water can cause your pile to get waterlogged and rot instead of compost, so monitor your pile closely to make sure it decomposing properly.
Steps 5 & 6: Continue to Turn and Water
Composting takes about three months to complete. During this time, monitor your pile’s moisture levels and water whenever the heap begins to dry out. Remember to turn your pile to aerate the compost. This helps control temperature and promotes proper decomposition.
Step 7: It’s Getting Hot in Here
It is important to note that your compost pile will heat up. That’s a good sign! The heat cooks the compost helping it to decompose. In the center of the pile, temperatures will reach up to 160 degrees Fahrenheit, which is why it is so important to turn your pile regularly (you don’t want it to combust).
Your Compost is Ready!
The entire compost process takes about three months to complete. Once the compost no longer gives off heat, and becomes dry, brown and crumbly, it is ready for use! Add four to six inches to your flower beds, garden and pots—your plants will love it!


